Tuesday, November 26, 2013

Vegan Tortilla Soup

This vegan tortilla soup is super delicious and is the perfect meal on a cool night. It's also a great way to clean out all the veggies in your fridge, feel free to add any vegetables you would like, the variations are endless.
Ingredients:
1 cup of chopped yellow onion
1-2 garlic cloves diced
1/2 cup chopped green pepper
1 15.5 oz can of white hominy
1 14.5 oz can of diced tomatoes
1/2 cup frozen corn
3-4 cups of vegetable broth
1 15 oz can of black beans
1-2 tbsp cumin
Juice of 1 lime
salt, black pepper, chili powder to taste

In a large pot over medium heat warm up about a tbsp of olive oil, add onion and garlic. Saute for about 5 mins, then add the green pepper and cook for an additional 5 minutes. Add hominy, diced tomato, corn and seasonings. Give it a good mix then add broth and beans. Bring to a boil then cover and let simmer over low heat for about 45 mins. Right before serving add lime juice and some crushed tortilla chips. Green onion, vegan cheese and cilantro also make tasting toppings.


XO,Ashley

Monday, November 25, 2013

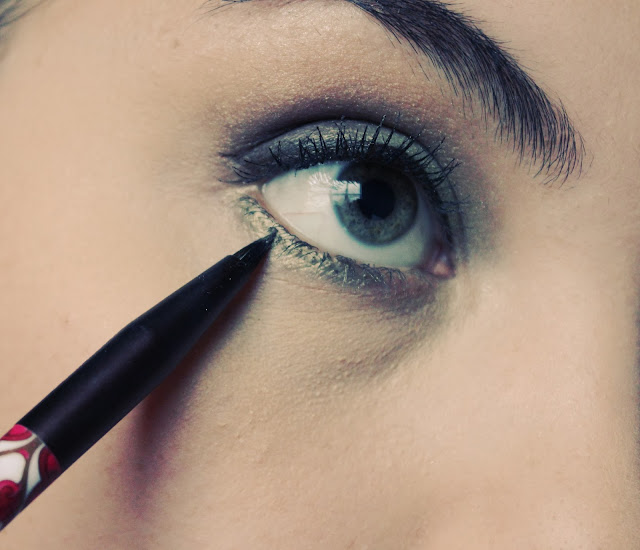
Coral/Bronze Makeup Tutorial

This look is super easy and can work with any eye-shadow color you wish. I just loved the warmth the bronze/coral colors brought to my face, and since I'm starting to look a bit pale these days I can sure use it! 
To create this look I used E.L.F. cream eye-shadow in the color Bronzed and Wet n' Wild Sparkle 'Til Morning Palette.

I started off by applying the cream shadow as a base and brought it down to the lower lash line.
Pat the coral shadow on top of the base and blend it upward. For a more dramatic look run it along the lower lash line as well.
Run some black eye liner along the water line and upper lash line. Using a pointed brush blend out the liner to soften the look. Add a few coats of your favorite mascara.
To tie the look together I applied a bit of bronzer, highlighter and peachy blush. For my lips I used Revlon's just bitten kissable balm stain in Adore.


XO,Ashley


Friday, November 22, 2013

Chocolate Covered Apples&Bananas

Most nights after dinner I get a craving for something sweet, nothing too indulgent just something to satisfying my sweet tooth. These chocolate covered apple and banana slices do the trick they're super easy to make and are so yummy!
Start off by slicing the banana up and placing them in the freezer for at least 30 mins, this will make them easier to handle. For 1 banana and 2 small apples I used 2/3 cup dark chocolate chips. Place the chocolate in a microwave safe bowl and pop it in for a 1.5 to 2 mins. Carefully take it out because it will be really hot and mix it till all the clumps are gone.
Using a fork or your fingers dip the fruit into the chocolate and place on a lined plate. I decided to top mine with some walnuts which add a nice crunch, coconut flakes or sprinkles would be great too!Place them in the fridge for at least 15 mins to harden and then dig in!

XO,Ashley

Thursday, November 21, 2013

D.I.Y. Potato Stamps

Lately I've been seeing potato stamps all over Pinterest and was interested in trying it out for myself. I honestly didn't know how well it would turn out, but to my surprise it was really fun. I will definitely be making more in the future!
I used one russet potato to make 2 stamps. There's an array of different kinds of potatoes that come in all sizes, choose according to how large of a stamp you want to create.
Cut the potato in half and use a sharpie to create the design of your choice. Then using an exacto knife carefully cut down and around the outline. To be festive I decided to make a Christmas tree and a star.
It's best to allow the stamps to dry out for a bit before painting. Then using a painting brush I applied my acrylic paint to the stamp. 
Make sure to insert a few paper towels or a dish cloth to the inside of the tote before painting to ensure it doesn't bleed through to the other side. Allow to dry for a couple of hours.
 I love the home-made look this bag has, these stamps would be great on stationary too. The possibilities are endless!

XO,Ashley

Wednesday, November 20, 2013

Glittery Green Makeup Tutorial

This smoky green eye-shadow look is so glamorous! It's perfect for nights out or upcoming holiday parties. This look is earthy yet sultry, it's great for all skin tones and eye colors. To create this look I used a combination of Maybelline's Sun-baked eye-shadow palette and E.L.F.s mineral eye-shadow in earthy.But of course you can use what-ever similar colors/products you have on hand.
Start off by packing on elf's earthy onto the lid. Since it is a loose eye-shadow I dip my brush into a bit of water first to help the shadow stick.
Next place a matte brown shadow in the crease working it up to before the brow bone. Tip: when working with glittery shadows it's best to start with the eye makeup before doing the rest of your face since there will be plenty of fall out.
Taking a glittery dark brown shadow blend it into the outer V working it up into the crease.
Next apply a highlight to the corner of the eye and brow bone.
To create a smoky look apply green eye shadow along the lower lash line.
Apply eyeliner and mascara. For a more dramatic look I decided to add some fake lashes.

XO,Ashley

Tuesday, November 19, 2013

Baby, it's cold outside.

Okay, so it may not be chilly enough to bundle up in a jacket and boots where I live, but a girl can dream. I've been daydreaming about all things cozy and inviting, so here is a list of a few things I've been loving lately.

How adorable is this Polk-A-Dot drawstring jacket, such a classic timeless piece.
My feet would definitely be warm and protected in these vintage inspired faux-leather lace up boots.
Loving this mustard knitted hat, the pom pom on the top is just darling.
This inviting space looks like the perfect spot to cuddle up to a good book and a cup of tea.
 Nothing is better on a cold day than a big mug of hot cocoa with plenty of marshmallows,yum!

XO,Ashley

Monday, November 18, 2013

Wet n' Wild Mega Last Lipstick Review

Recently I was in the market for some new vampy/bold lipsticks to add to my collection. I didn't want to spend a bunch of money, so I headed to the drugstore and picked up a few of these wet n' wild mega last lipsticks. On the website they claim this lipstick last up to 4 hours and wont bleed or fade. With a $1.97 price tag I was a little skeptical, but decided to try them out. 


This gorgeous cranberry red color is called Cherry Bomb. Its such a classic red color and its my favorite out of them all.
This lovely raspberry color is called Sugar plum fairy, its perfect for days that you want a nice bright look.


Vamp it up is definitely a bold color. Its a beautiful deep dark plum shade that's build-able allowing you to control the intensity of the look.

Review:
Pros:Great pigmentation,Affordable, pretty good lasting power.
Cons:Horrible packaging,its very drying if worn without any lip balm,starts to crust up after awhile.

 After reviewing these three colors from the mega-last collection I would happily purchase more in the future. For such an affordable price you're getting a great lip product. 

XO,Ashley

Wednesday, November 6, 2013

Halloween 2013

I can't believe its already November, where did the time go?! October was such a wonderful month full of fun times like Austin City Limits Music Festival, fall shopping and of course Halloween.
These beautiful flowers were a wonderful surprise from my sweet husband. They really help bring fall vibes into my home and they lasted forever!
Of course you cant have Halloween without jack o lanterns, I  loved having these little guys hanging out on my door step.
My husband and I were decaying zombies for Halloween. Can you believe all I used was Kleenex and liquid latex to create those gruesome bloody wounds. 
I made these vegan chocolate chip cookies for a Halloween party, and they were a hit! 


Even though I'm suffering from a bit of post-Halloween depression I'm so excited for the holiday season to start!


XO,Ashley